Create!

Create!

Saturday, August 6, 2011

Bead Soup Blog Party Time!

Wow!  362 participants in this Bead Soup Blog Party!  This is gonna be fun! 


Check out the list at Lori Andersons Blog Pretty Things.  Thanks Lori for all of your hard work on this!

Tuesday, July 26, 2011

Etsy Team Fun

Check out this Etsy Delaware Street Team Treasury...Summer Rainbow  !  My Purple Swirl pendant was included in it.


I enjoy Etsy. I don't sell much on there but I still enjoy it. So much creative energy out there!

Stay cool if you can!

Wednesday, July 20, 2011

Big Beads

I have made some big beads with polymer...  This bracelet reminds me of the Flintstones. I can see Wilma Flintstone wearing this with her one shoulder dinosaur skin dress!  These beads were made using cornstarch packing peanuts.  The packing peanuts I found were green not white. You need to read the label and make sure they are cornstarch peanuts if you want to try this technique.


The cornstarch peanuts will dissolve in water.  To make a big bead base you add a drop of water to a few of them and mush them together into a ball... well at least as close to a ball as you can.  Mine didn't seem to get really round.  You let the peanut mush dry.  You can then wrap clay around the peanut.  You need to poke holes through the clay for bead stringing as well as to get water in the bead to dissolve the peanut mush after baking. The hole needs to be fairly big but not too big.

I found that the beads were light weight but also that they could break if not careful.  You can of course make the clay thicker around the peanut mush. 

I also found it tedious to get the peanut mush out of the bead after baking.  It turned into a green slimy sludge that I had to blow out of the beads after soaking them in water.  It took several times of soaking and blowing through the beads... my jaws were hurting like when you blow up too many balloons... not so fun.

I am always interested in trying new techniques. So when I saw the big beads in this book I had to give it a try!  I purchased Ancient Modern Polymer Clay and Wire Jewelry by Ronna Sarvas Weltman.  I love her polymer work.  It is very organic looking. 


I made a necklace and some earrings using the technique in her book with aluminum foil as a base for the big beads. It worked well. The beads are light in weight and I could get a more round bead.


Something else I learned from the book... I used brown shoe polish to antique the beads.  I am thinking that Renaissance Wax and shoe polish are made from the same chemicals because they sure smell the same! It was interesting to learn some new techniques!  

Sunday, July 17, 2011

Bead Soup Blog Party Time is Coming!

It is time once again for the Bead Soup Blog Party!  Our hostess Lori Anderson makes a list of everyone who wants to  participate and pairs us up with someone else.  You send beads from your stash to them and they send beads from their stash to you.  It is so much fun to see what everyone makes and a challenge to make something from beads you might not buy or use yourself.  Definitely gets you out of the box!   It is also a great way to meet new people!  Hope to see you sign up for it!


Thursday, July 14, 2011

Micro Macrame

Ok so I confess that I can spend hours playing Bejeweled Blitz and Mahjong on Facebook.  I decided that I needed to find something else to do in the evenings when I am too tired to do anything but watch TV. So I thought I would try a macrame project.  I can sit in my chair with my puppies next to me and work with something little.  Micro macrame sounded like it might be a project to start with.
Under over... over under....  under over...ok so I was kind of a hippie back in the day and it all came back to me when I started on my micro macrame project.  In the 70's we were very cool and thought macrame jewelry was "far out".  Sounds funny now!  Things in life do cycle around. So here I am doing macrame again 30 years later.
 I worked with number 3 thread which is pretty thin but it came together.  I used a pattern purchased from http://www.free-macrame-patterns.com/    I also used what I had on hand and didn't plan too much in advance for this.  It took me a couple of hours but I was able to work on it while watching TV in the evenings. So all in all I am happy with the project.


I will plan ahead and make this bracelet again.  I will make some flat polymer beads and color coordinate a little more.  I enjoyed doing macrame way back when and still found it fun to do!

Sunday, June 26, 2011

Bo Jangles

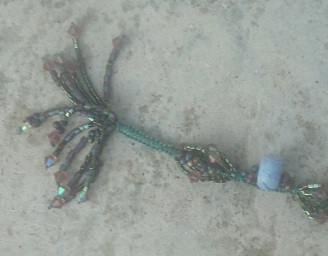
I am enamored of making fuzzy, dangly neckpieces.  It seems I add more and more dangles to each one that I make.  I have done well at a local art gallery with these pieces.  The The Rehoboth Art League is situated on a beautiful campus in Rehoboth Beach, Delaware.  If you are ever in the area and enjoy art galleries it is definitely worth visiting.

The latest piece that I have finished is in greens and blues.  Fun to make and fun to wear!


The turquoise drops are made from translucent polymer mixed with alcohol inks.  Messy to do but the colors have a different look that I like... very watery.  So this one I called Bo Jangles... reminds me of the beach and if the beads made noise it would definitely jangle!

Monday, June 20, 2011

Fun with "Man Tools"!

Not really man tools but Harbor Freight is definitely one of my hubby's favorite stores.  He walks up and down every aisle very slowly... just like I do at the craft stores... you never know what you might find that you might be able to use - especially when making polymer beads.

I found this carving set at Harbor Freight.  It was inexpensive and I thought the tools would be fun to use on polymer beads for texture. 


Some of the points are a little sharp so be careful if you purchase a set of these.  I had fun making these beads with the carving tools.


  I also got some brass and aluminum tubing in round and square at the "man store" hobby shop....you know where they sell boats, planes, trains and helicopter parts... 


They make great little squares, circles and petals in the clay.  I do the texturing before they are baked then dust them with some mica powders... I named this set "ninja"... the big bead looks like a ninja face to me!  If I have to shop with my hubby I make the most of it... and try to think out of the box!  An interesting find is that these tools cost less than those made specifically for polymer clay design work.  That is always good!